

Nothing ruins a trip faster than a travel trailer problem. You’re headed out to have the time of your life then, BAM, you’re hit with a problem. Many problems can be avoided with proper maintenance and quick fixes. In this article, I list the most common travel trailer problems and tips to help you deal with those problems.
Here are some common travel trailer problems:
- Water Leaks
- Plumbing Problems
- Toilet Malfunctions
- Tire Failure
- Wheel Bearing Failure
- Broken Slides
- Electrical Problems
Water Leaks
Travel trailer leaks can signal a slow and painful death for your travel trailer. Recently, we were looking to purchase a hybrid travel trailer. One that we looked at had a soft floor in the corner of the trailer. On further inspection, we found that the floor was rotting from a water leak. Since the damage was hidden under the linoleum flooring, the owner didn’t even know it was there.
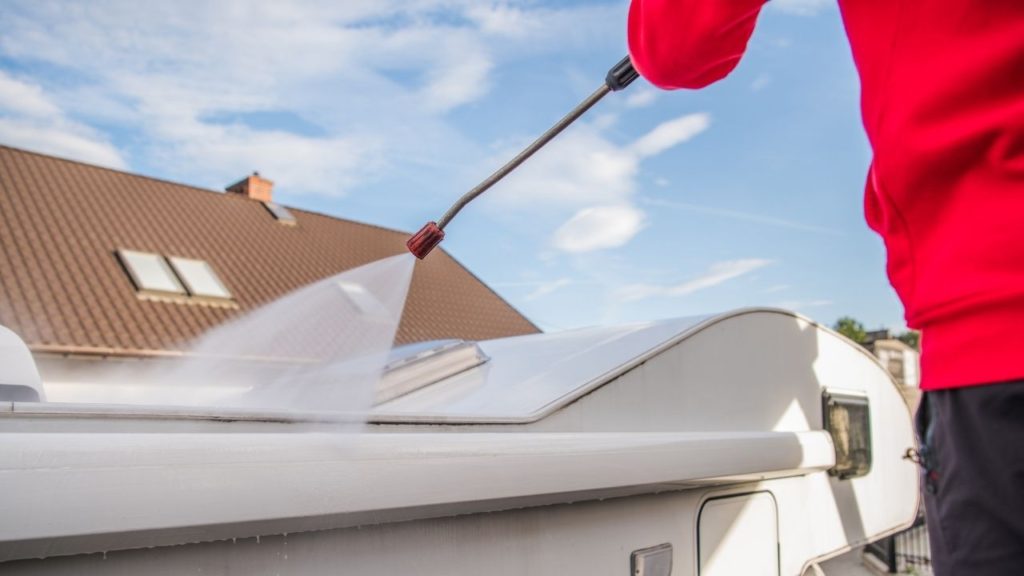
Roof Leaks
The aging process of a traditional trailer along with exposure to the elements, and the constant shaking experience while traveling down the road will eventually weaken the roof of a traditional travel trailer. This can lead to leaks over time through the damaged roofing material. Roofing material is also susceptible to sunlight, freezing temperatures, and precipitation.
There are two main ways that your travel trailer can get a leak. The first is water intrusion. Travel trailers are susceptible to water intrusion on the roof, providing an area where leaks can occur. Any place that has, or potentially has, any kind of gap can allow for water to intrude into your travel trailer. Flat-topped travel trailers are the most susceptible to water intrusion because water pools on the roof.
The most common area where travel trailers leak is through roof seams. Traditional flat-topped travel trailers have seams on the front, back, and sides where the top of the trailer is attached to the walls. In addition, vent fans have seams. These are very common areas that can allow water intrusion if not properly sealed.
Any area on the roof that has an opening is susceptible to water damage. Therefore, anything that is bolted to the roof is a potential area for water intrusion. For example, if you have solar panels that are bolted to the roof, that’s an area where you can have water intrusion. If you have skylights, that’s an area that has the potential for leaks. Another place that can potentially get water intrusion is anywhere that you have a vent pipe. You may have a vent pipe for your toilet that can be a potential area for leaks.
While your air conditioning unit most likely has a gasket, if the gasket becomes loose or old, you could potentially have a leak there as well.
Windows and Side Vents
Windows are the second most common area for leaks. Every time your travel trailer goes down the road, it’s under earthquake-like forces. Over time windows loosen up. This can cause gaps where water can intrude.
Another, albeit, less likely place for water to intrude is venting on the side of your trailer. Like windows, refrigerators and range hoods often vent to the side of a trailer. If you experience a leak, and can not find water intrusion on the roof, this is a good place to look.
Leak Prevention
Inspect all trailer orifices (seams and penetrations), especially on the roof, at least annually. Check all seals and gaskets to make sure they are tight. Reseal gaps or cracks. Depending on the condition of the original sealant you may be able to seal over it or you may have to remove it and apply all new sealant. Prior to applying any new sealant, be sure to wash the roof and make sure that it is thoroughly dry.
It’s not normally necessary to apply a coating to the whole roof; this is an expensive proposition and it makes it difficult to check the status of each seam or penetration. In addition, if you do discover gaps or cracks, you’ll have to cut the coating away from the gap or crack to make the repair.
There are two main types of sealant that we use. We use the Dicor self-leveling sealant in areas like the roof because it flows when first applied. For example, it will flow into cracks and crevices. For areas where you need a controlled width, non-leveling Dicor sealant works the best.
Be sure to check with the travel trailer manufacturer to make sure you can walk on your roof.
Leak Repair
The most important consideration in leak repair is to locate the source of the leak and repair that. Often it is difficult to determine the source of a leak. The best course of action is to inspect the entire roof and any other locations where water can intrude, such as windows and vents. Just because you find water inside the rear of the trailer does not mean that the source of the leak is necessarily in the rear of the trailer.
After you locate and repair the leak, evaluate the damage. The extent of the damage will determine the course of repairs to your trailer. If the damage is cosmetic, you may just be able to refinish the damaged area. If the damage is more extensive, structural repairs may be required.
Plumbing Problems
As a travel trailer owner, you might also experience plumbing problems. There are a few issues that can cause plumbing problems. Pipe leaks and toilet malfunctions are the most common issues.
Pipe Leaks
There are a few things that will cause pipes to leak. As I mentioned before, your trailer is experiencing earthquake forces as it moves down the road. These forces push and pull against the plumbing connections, which can be loosened from normal trailer vibration. If you have a leak that is not caused by rain or water intrusion from the outside, you probably have a plumbing leak. In this case, the best thing to do is inspect the pipes for leaks, paying close attention to any connections. If you don’t have plumbing experience, these fixes are best left to professionals. Mobile RV specialists and RV repair shops will be familiar with RV plumbing problems.
Frozen water in your plumbing system can also cause plumbing failures which result in leaks. Water trapped inside the plumbing system expands when frozen, damaging pipes, connections, and fixtures. This is why it is imperative to winterize your system ahead of freezing temperatures.
There are two methods to winterize your trailer. The first and most effective method is to add an appropriate RV antifreeze (like Splash RV Antifreeze).
Always winterize your trailer according to the manufacturer’s instructions.
Before adding antifreeze, be sure to drain and bypass your water heater. Drain and blow out all the lines with an air compressor. Completely drain the black and grey tanks. Add antifreeze to the drains and toilets. Camco makes the RV Fresh Water Blow Out Hose to facilitate this task: Camco 36170.
If you use your trailer during the winter and live in a place where freezing is unlikely but possible, consider emptying the tanks and blowing out the lines. Be sure to empty the water heater. We use this method and have never had plumbing failures due to freezing.
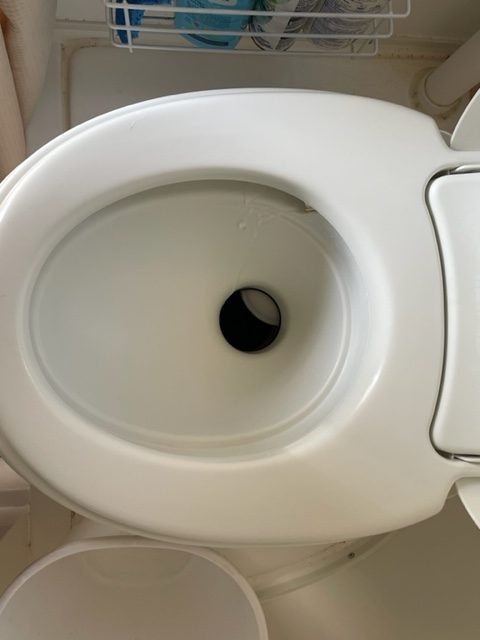
Toilet Malfunctions
The most common problems trailer owners experience with their toilets are faulty gaskets, clogging toilets, or stuck valves.
Toilet Clogs
Most clogs can be avoided. Clogs in trailer toilets most commonly occur when there is a low water-to-solids ratio. After we empty the toilet, I always add about a gallon of water along with the RV toilet deodorizer. I like drop-in deodorizers like these Camco citrus drop-ins because they are easy to store and easy to apply. Drop-ins don’t require any measuring like other liquid or granular tank deodorizers.
Stuck Toilet Valves
Two valves operate when you flush the toilet; the flapper valve and the water valve. Both the flapper valve and the water valve open when you press the lever to empty the toilet. Two of the most common problems with the flapper valve are debris in the valve and when the valve becomes dry. You’ll normally notice these problems because the valve won’t close, but it can also happen when the valve is closed and then won’t open.
If you have debris in the valve, like toilet paper, it may require manual removal. Oftentimes, repeated rinsing with water will dislodge the debris. Liquid dish soap can help lubricate the valve if it’s stuck open or closed. If the valve is stuck open, turn off the water pump and apply the dish soap. Forcing the valve can result in damage to the valve. If you haven’t used your trailer for a while, it’s a good idea to put some water in the toilet to moisten the flapper valve.
Faulty Toilet Gaskets
Faulty toilet gaskets can cause leaks around the base of the toilet. Cracked, brittle, and dried-out gaskets have a tendency to leak. Gaskets need to be flexible to work properly. Harsh chemicals, like bleach, can damage the toilet gasket. If changing your toilet gasket is not a problem that you want to tackle, contact your RV repair specialist.
Tire Failure
Having tire failure while moving down the road with a travel trailer can be a dangerous safety issue. There are a few main causes of tire failure including, age, leaks, bruising, and underinflation.
Age
Old tires will degrade over time from exposure to UV radiation. Since rubber and steel belts are not compatible, these components will lose their adhesion over time and cause tire separation. If you’ve ever had a blowout, then you know that you don’t want that to happen to your trailer tire while you’re driving down the road at 60 mph.
I have had tire separation happen to me before, not on a trailer, but on a vehicle. It was a hot summer day so the pavement was hot and the tires were old. The tread separated from one tire and caused a blowout. It was a scary situation, but fortunately, it was the rear tire instead of the front tire. I was able to pull over to the shoulder to change the tire.
Sparks from tire blowouts can cause wildfires. And, you can be held liable if your unmaintained car causes a wildfire. In 2018, a trailer-tire blowout caused the Carr fire in California; a fire that killed 7 people, leveled 1000 homes and buildings, and burned 229,000 acres of land.
Not only can UV exposure cause tread separation to your tires, but it can also cause cracking. A cracked tire is a sure sign that the rubber on the tire is deteriorating and they need to be replaced.
As a general rule, it’s important for tires to be replaced every five years whether you see degradation or not. Every tire has a date code so you can check the date on your tires.
In addition, it’s good to verify the date code of new tires that you buy so you get the most recently manufactured tires. Always ask to see the date code before the tires are installed to make sure the tires aren’t old. Normally, if you buy tires at a reputable tire shop, you won’t run into this problem since tire shops sell a high volume of tires.
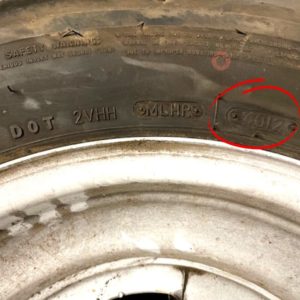
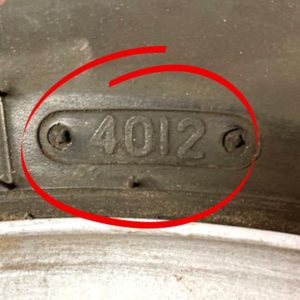
The date code is imprinted in the sidewall of your tire normally on the inside. The last four digits of the code on the sidewall of the tire give you the date the tire was manufactured, with the first of those four digits being the week the tire was manufactured, and the last two digits being the year the tire was manufactured. For example, if the last four digits of the code on the sidewall are 1020, it means that the tire was manufactured in the tenth week of the year 2020.
In order to prevent UV exposure, we always keep our spare tire covered and cover our trailer tires whenever the trailer is being stored.
Leaks
Leaks can be caused by punctures, cracks, failed valve stems, and damaged bead seals.
It’s no secret that punctures can cause leaks. Commonly, road debris, like nails and screws are often the culprits for tire leaks. However, other sharp objects like sharp rocks and sharp pieces of wood can cause punctures. When my husband worked as a mechanic at Chevron, a customer came in with a tire punctured by a pocket knife.
Leaks can also occur from the valve stem, either from the perimeter of the valve stem, or the valve stem itself. Physical damage, deterioration, and improper installation can cause leaky valve stems.
Damaged bead seals can also cause your tire to leak. If you have a rusty wheel or if dirt is trapped between the wheel and the tire, the tire can leak.
Bruising
A tire can have internal damage from a prior impact. Internal bruising that is caused by an impact with a curb, large pothole, or foreign object on the road can occur.
Under inflation
Tire under-inflation can create heat buildup that can possibly break down tires and cause tire failure. Before each trip, be sure to check your tire pressure. Check your trailer owner’s manual for the appropriate tire pressure for your trailer tires.
Appropriate tire pressure can vary from trailer to trailer.
Wheel Bearing Failure
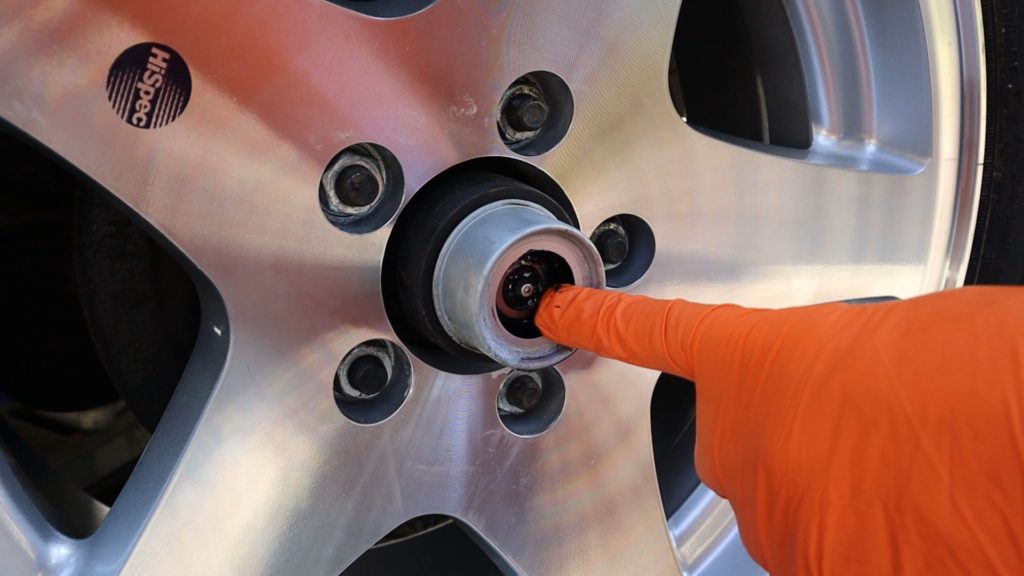
Wheel bearing failure can be caused by insufficient maintenance, improper installation, overloading, or manufacturer defects. Like tire failure, wheel bearing failure can cause sparks that could potentially ignite a fire.
Under normal circumstances, wheel bearings need annual maintenance. If you use your trailer more than normal or if you pull it through water crossings where the wheels are submerged, annual maintenance will not be sufficient.
Over or under-tightening of the wheel bearing spindle nut can cause wheel bearing failure. Find a reputable mechanic that has experience with wheel bearing maintenance. Improperly trained mechanical personnel can inadvertently under or over-tighten the wheel bearing spindle.
In addition, worn, damaged or improperly installed seals can cause wheel bearing failure.
Manufacturing defects or low-quality bearings can cause wheel bearing failure. Recently, we watched a YouTube video where a wheel bearing failed after 7000 miles! And, another of the wheel bearings on this trailer was found to be faulty. Timken wheel bearings are made in the USA and are high-quality wheel bearings. Also, Koyo wheel bearings, which are made in Japan, are another good alternative.
Broken Slides
RV slide-outs or slides are notorious for failures. It can be a huge headache when slides are not working properly. Sometimes closed slides block access to important areas in your trailer, like the bathroom. So when they aren’t working, you won’t have full access to the trailer. And, if you can’t get your slide in, you have an entirely new problem. Imagine having your slide malfunction when you have to leave the campground.
Fairly commonly, the slide mechanism breaks. The motor can break, hydraulic lines can leak, and the track can get off kilter. Slide mechanisms must be checked and lubricated regularly. Whenever you use your slides, make sure your trailer is level before deploying the slide, have the wheels chocked, and the stabilizing jacks down. This will help prevent slide-out problems. Don’t overload the slide, and if the slide has an outdoor storage compartment or indoor drawers, use that space for lighter items. When you deploy the slide, make sure you press and hold the button until the slide is completely deployed; don’t stop part way.
Slides are another area where the trailer can leak. Clean and maintain your slide-outs. This will help prevent separation and leaks. There are a few things you need to do to maintain the slide-outs. First, clean off the putty tape that leaks out of the wall connections of the slide-out. Second, check the screws to make sure they are not backing out, and tighten any loose screws so you have a good seal. Replace rusty screws. After that, silicone the side edges. Replace the insert molding every 3-5 years. Clean and lubricate the seals using an RV slide conditioner. Check damaged hardware and replace anything that is damaged.
Slide Toppers are the small awnings that automatically go out over the slide when it’s deployed. Designed to keep leaves, water, and other debris off the roof of the slide, you must watch them in inclement weather because water can still pool on the top of the slide. You must get the water off the slide before you bring it in or the water will come in with it. Regularly inspect the slide topper for rips or tears, and to make sure the mechanism is properly functioning when the slide rolls in or out.
You should never allow snow to collect on your slide. Slides are not designed to hold the weight of snow. In addition, snow on the slide will make retraction difficult. And when you do retract the slide, expect to get some snow in the trailer.
Wind can cause an annoying flapping noise from the slide topper. Many people put their RV slides in if it’s windy enough out.
Electrical Problems
Some common electrical problems are dead batteries and loose connections.
Batteries
If you’ve ever had a dead battery, you know how frustrating it can be. If you have a lead-acid or AGM battery, draining the battery down completely can ruin it. Lead-acid batteries need periodic maintenance. AGM batteries and lithium batteries are fairly maintenance-free and worth the additional cost, in my opinion.
Batteries can lose charge over time like when the trailer is stored and not in use. If your battery will not be in use for some time, trickle charging can save battery life. For trickle charging, we like the Schumacher chargers. The Schumacher SP1298 is compatible with all batteries, including lithium batteries. The great thing about these types of chargers is that they turn off when the battery is full.
With all batteries, make sure the connections are tight and clean. Battery posts on lead-acid batteries must be inspected periodically for corrosion and cleaned when necessary.
Electrical Connections
Loose or poor connections can cause electrical issues. Inspect electrical connections to make sure wires have good contact.
Conclusion
Proper maintenance and attention can reduce your travel trailer problems and increase your outdoor enjoyment.